TONY INGRAM HISTORIC RACING .....Fast7s@yahoo.commailto:fast7s@yahoo.com?subject=Home.htmlshapeimage_1_link_0
 
LOTUS 7 S2 RESTORATION

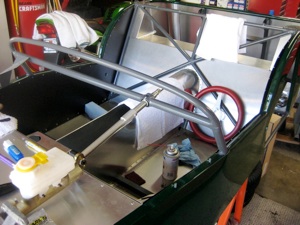
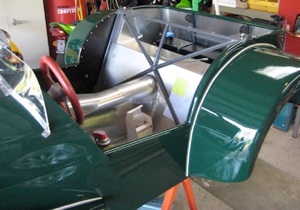
My S2 7 project is now underway ..... I thought it might be interesting for some enthusiasts out there to see a step by step build up.  Not a completely standard restoration but I think tastefully modified.

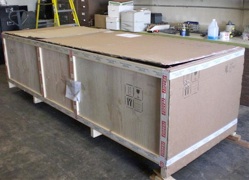
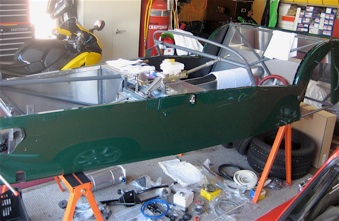
I had been waiting quite a while for the chassis to come from England.  Most of the delay was having it painted.  I dread to think how many hours I spent polishing the body on my race 7.  As you can see in the picture on the home page, I kept all the alloy polished.

This time all I have to is a wax job.  Get that crate open and full steam ahead .....

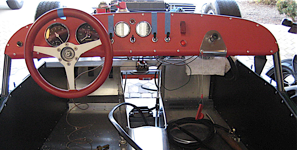
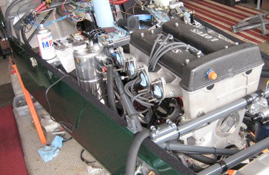
The plan is to build the car as a fast street machine, also to be a good track day car and perhaps even the occasional vintage race.


I hope you enjoy the 7 as it grows, pictures will be added regularly.

Not every day of the week you get a box this big!  Exciting stuff....

Signs of professionals at work - beautifully packed, 6000 miles in a crate and the new alloy never had a mark on it.

With the chassis now on stands the small parts start to go on ...

... brake masters ...

... steering column and rack.

Brake lines ...

I decided to do all the lines in Dash 3 flexible stainless hose.


‘No bending required’

The dry sump tank and battery tuck away neatly on a false floor just in front of the foot box.

With the axle housing strengthened, blasted and painted it is now mounted in the chassis for brake line layout.

The ‘Standard 10’ axle used in the S2 7  is very light but also fragile.  it can be made much more durable with the use of Triumph Spitfire parts ... however I had a Ford Escort axle in stock so I went the ‘Series 3’ Ford route.  The Ford axle is very durable and easy to get parts for ....  there is quite a weight penalty however.

Dash is riveted in place -  with a new instrument layout to better suit a competition car

Not my favourite job - building a wiring loom.

It takes forever but thinking about it is worse than the execution.

Front suspension and brakes are on.  I modified the top link replacing the rubber bush with a rod end - This allows the camber to be easily adjusted. If you switch from radial street tyres to bias ply track tyres the suspension set up is very different. Easy adjustability is most welcome.

NOW THE INTERESTING STUFF BEGINS ......

The 1500 pushrod was due to go back into the car however it’s in need of a full rebuild.  The twin cam I had sitting was looking in need of a project, so ‘why not’ I thought.  I was quite surprised how easy the motor was to install - very few mods needed!

The dashboard is now complete and the wiring tested good first time, which is a ‘first’.

Always happy to get it out of the way.

The front and rear wing fitting is always very time consuming.  Probably due to the poor fit and finish of the original-style aftermarket wings.  I was very tempted to fit the better quality ‘Caterham’ fibreglass but i don’t think it looks quite right on a S2

Transmission went in with the engine .... flyscreens also fitted and the mirror is on .... Just need to practice on a ‘door’ mirror set up that sees past the rear wing!

CLICK HERE TO CONTINUE .....7_rest._continued.html

Fitting the nose turned into an epic task - finding clearance for the ‘A’ arms and getting all four Zeus fasteners to work !

One big difference with the twincam is that the carbs are on the other side - cutting a hole in the bonnet and fitting the air scoop was nervous work.

With the twincam power I decided better brakes would not go a miss, this disc conversion fits really well, just bolt on, no cutting or welding required...

HOMEHome.html
RESTORATIONSRESTORATIONS.html